

MarketRooms creator guide
How to create a trading community on MarketRooms
By MarketRooms · Published
1. Check your creator access
Open Create your room and sign in. Community creation requires creator approval. If you see Creator approval required, use Request creator access to contact support with the audience, markets and discussion format you want to host.
Approved creators can start with one community without an owner subscription. The creation screen shows your allowance. If it is already in use, manage your existing room or contact support instead of starting another setup.
Before filling in the form, decide what a member should find on their first visit: a market to discuss, a piece of research to read, or a lesson to work through. A specific starting point makes the room introduction easier to write.
2. Create the room and choose its access
Enter a Room name and a short Description, then choose Visibility:
- Public: anyone can join.
- Unlisted: shared by link. Use private access if entry needs an invitation.
- Private: invitation required.
Select Create room to open its management workspace. The public community page starts as a draft. Creating the room does not publish that page automatically.
Paid membership is a separate setup that requires activation for your community and a ready Stripe account. Check the current creator membership details before offering paid access.
3. Build a useful public page
In the workspace’s Room page tab, add a headline and an introduction under About this room. Explain the markets you cover, the type of discussion you host and what someone can expect after joining. Add the relevant markets, branding and public examples.
The headline and introduction are required for publication. Other material should earn its place: a cover can establish the room’s identity, while a sample can show how you explain an idea. Only include previews you intend visitors to read before joining.
Choose Save draft, then Preview saved page. The preview uses the saved version, so save any newer edits before checking it. Room settings have their own save action in the Settings tab.
4. Add ideas, research and lessons
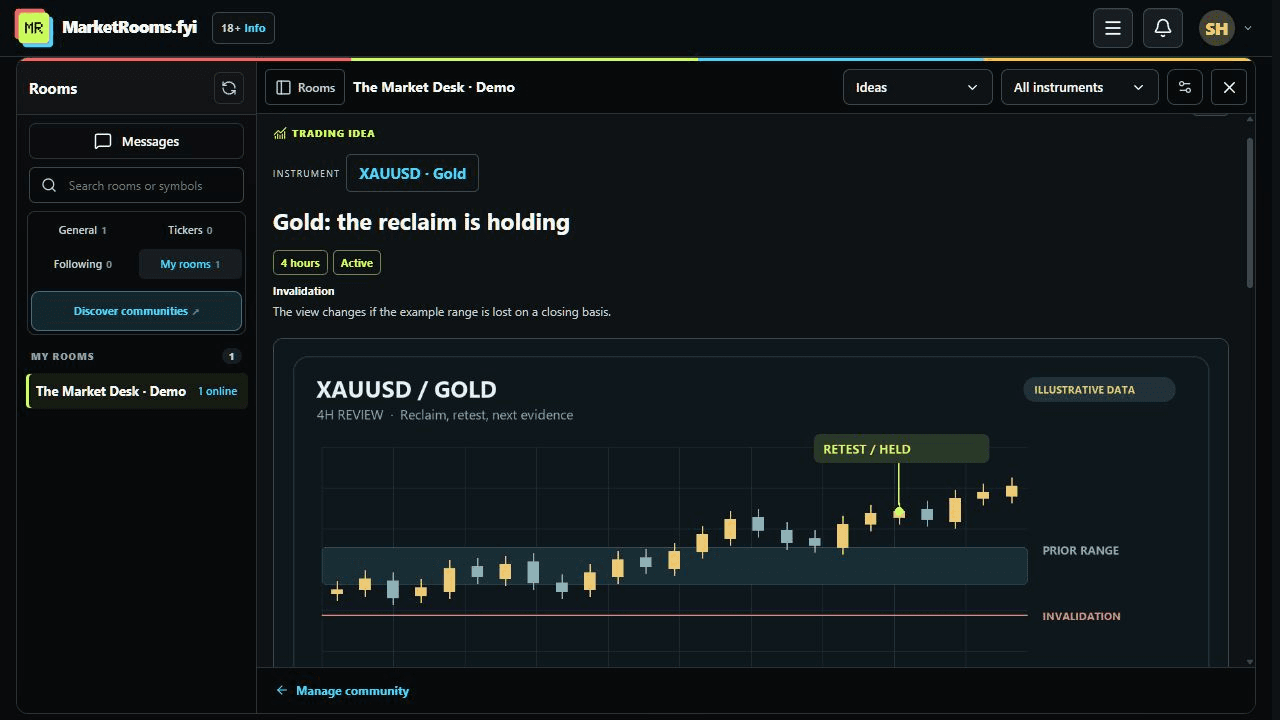
Use Room content in the workspace to open your community’s material beside its chat. Choose the section that matches what you are publishing:
- Ideas → New idea: select an instrument from the community’s saved list, then write the thesis, timeframe and condition that would invalidate the view. Choose an initial status and add a supporting chart or link when useful.
- Research → Publish research: add a title, explanation and relevant instruments. Use supporting sources and material to make the reasoning easy to inspect.
- Learning → Add lesson: choose the level, optional duration and lesson order. Give the lesson a clear purpose and include the material someone needs to follow it.
If an idea’s instrument is missing, the owner can use Add or edit instruments. Review screenshots and attachments before sharing them; account details visible in an image are not hidden automatically.
5. Publish the page and member content separately
Publish page makes the community’s introduction and selected previews public. Entry into the chat and member resources still follows the room’s access settings. A public page does not turn a private conversation into a public room.
Each content item has its own Publish for members control. Leave it unchecked and choose Save draft while preparing the item. When ready, enable it and choose Publish item, or Save changes when editing an existing item.
Before sharing the room, check its public page while signed out and review its member experience with the intended access level. An owner’s preview alone does not show what every visitor can open.
6. Give the first conversation a starting point
Publish a short welcome with the room’s focus, discussion rules and one concrete question. Link to your first useful item so members have something to respond to. The community guidelines provide the platform-wide expectations; explain any additional rules for your room.
Share the published room link with an audience that has asked to hear from you. Members can join from the web, and the extension is optional. Send new participants the trading-chat walkthrough if they want to keep the conversation beside their chart.
7. Keep the original work and follow-up connected
When an idea changes, add a dated follow-up to that idea and update its status through the follow-up control. Explain what changed so a returning reader can follow the sequence. Keep questions about research or lessons beside the original material through their discussion.
Review your room analytics to understand visits and participation. Public unique visitors totals count distinct signed-in visitors across recorded visits and available history; they are different from current members or people active this week. None of these counts establishes trading performance.
Use the member’s community checklist to review your own page, or explore the trading community features before your next update.